Why Choose Fluted Wall Panels for Your Project?
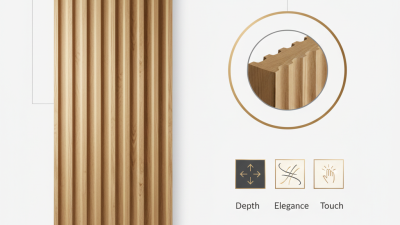
Why choose a Fluted Wall Panel for a project? Its narrow grooves create a play of light and shadow, adding texture without relying on bold colors or busy patterns. The effect changes through the day. Subtle, but noticeable. Architect Frank Lloyd Wright’s principle, “Form and function should be one, joined in a spiritual union,” offers a useful lens for evaluating this detail. Wright was not discussing fluted panels specifically; his idea simply reminds us to consider appearance and purpose together.
A well-chosen panel can bring rhythm to a plain hallway, reception area, or living room feature wall. It may also help define zones in an open-plan space. Results depend on the panel’s material, groove depth, finish, and installation quality. A shallow profile in matte paint feels different from a deep, wood-look surface under angled lighting. Samples matter. View them in the actual room, not only under showroom lights.
There is a catch. Fluted surfaces can collect dust in their grooves, and some materials need more careful cleaning than others. Moisture exposure, wall condition, and the manufacturer’s installation guidance also deserve attention. A striking sample can mislead. This guide explores where Fluted Wall Panel designs work well, what to compare across materials, and which practical details can affect the finished result. The best choice is not always the most dramatic one; sometimes, a quieter profile fits the space better.
What Are Fluted Wall Panels?
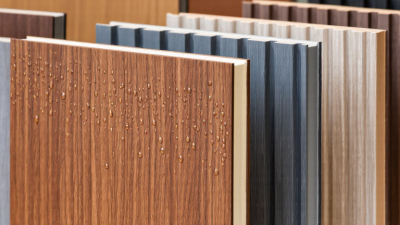
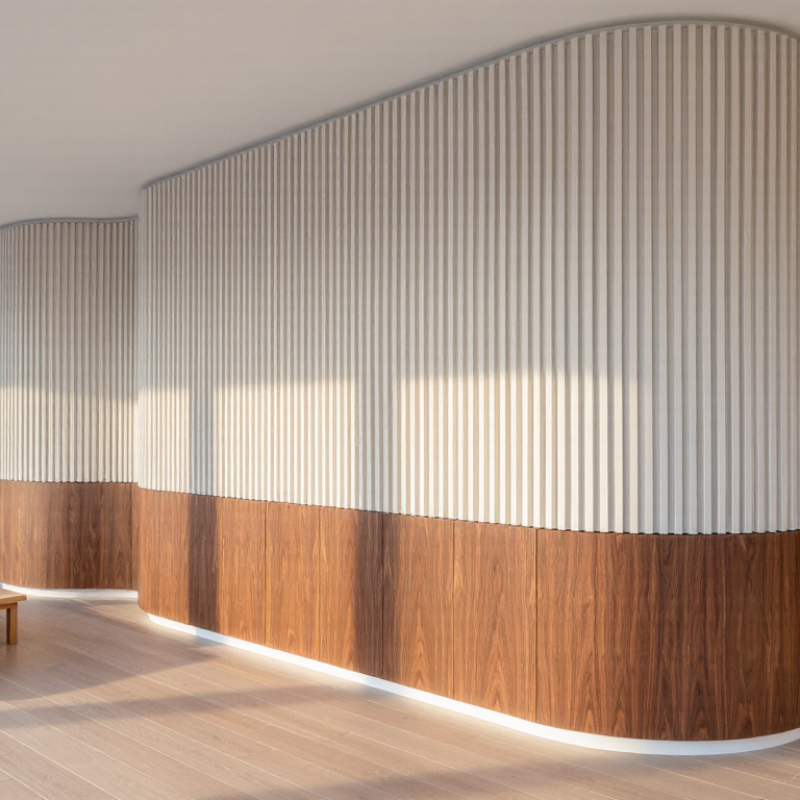
Fluted wall panels are interior or exterior boards shaped with repeated vertical or horizontal grooves. Their raised ribs and recessed channels create a linear surface, adding shadow and texture to a plain wall. Panels may be made from timber, engineered wood, mineral-based materials, or polymers. The material, core, and fixing method affect weight, moisture tolerance, durability, and maintenance. Some products are decorative only; they should not be assumed to provide structural support or meaningful sound insulation. Check the technical sheet. Look for fire classification, installation guidance, and acoustic test results where relevant.
The look is only part of the specification. The 2023 Global Status Report for Buildings and Construction, published by UNEP and the Global Alliance for Buildings and Construction, reports that buildings account for 37% of global energy- and process-related carbon dioxide emissions. That figure covers the whole building sector, not fluted panels specifically. Still, it is a useful reminder to assess material quantities, service life, and environmental product declarations rather than judging sustainability by appearance. A narrow groove can collect dust, and uneven walls may complicate installation. Small detail, real consequence. These panels can make a room feel taller or more ordered, but the effect depends on lighting, spacing, and the surrounding finishes. A sample beside the actual wall is often more revealing than a catalogue image.
Why Choose Fluted Wall Panels for Your Project? - What Are Fluted Wall Panels?
| Panel Type |
Typical Characteristics |
Suitable Uses |
Key Considerations |
| Solid wood |
Natural grain and a warm appearance; can usually be stained or painted. |
Living rooms, bedrooms, offices, and feature walls. |
Often costs more than manufactured alternatives and may expand or contract as humidity changes. |
| MDF or wood-fiber composite |
Consistent profiles and a smooth surface that is commonly supplied ready for painting or finishing. |
Interior walls in dry, climate-controlled spaces. |
Protect from persistent moisture; cut edges and joints may need sealing and finishing. |
| Polymer or PVC |
Lightweight, moisture-resistant options are available, with surfaces that are generally easy to wipe clean. |
Kitchens, bathrooms, utility areas, and other spaces where cleaning is important. |
Check the product’s heat, fire, and installation ratings; appearance and rigidity vary by construction. |
| Wood veneer on a panel core |
A real-wood surface over an engineered core, combining wood appearance with a more uniform panel construction. |
Residential and commercial feature walls in relatively dry interiors. |
Protect the veneer from standing water, impact, and abrasive cleaning; color and grain can vary naturally. |
| Fluted acoustic panel |
Decorative slats or flutes are combined with an absorptive backing; acoustic performance depends on the full assembly. |
Meeting rooms, studios, media rooms, and other spaces where reducing reflected sound is a goal. |
Look for tested sound-absorption data for the specified product and installation, rather than relying on appearance alone. |
Material properties and performance vary by product, finish, backing, and installation. Confirm suitability and care instructions with the product specifications before selecting panels.
How Their Profile Shapes Light and Space
Why Choose Fluted Wall Panels for Your Project?
How Their Profile Shapes Light and Space
A fluted wall is not visually flat. Its narrow ridges catch light on one side and cast fine shadows on the other. As daylight shifts, those bands move across the surface, adding depth without changing the room’s footprint. Pale finishes tend to soften the contrast; darker finishes can make each groove feel more pronounced. The effect depends on the light angle, flute depth, and nearby windows, so a sample viewed under one lamp may mislead.
This matters in rooms where lighting already shapes comfort and energy use. The U.S. Energy Information Administration’s 2018 Commercial Buildings Energy Consumption Survey reported that lighting used 17% of electricity in U.S. commercial buildings. Fluted panels do not automatically reduce that figure. But their changing highlights can make a wall feel more dimensional, especially with grazing light, where a fixture aims across the surface rather than directly at it. Keep the source controlled. Strong grazing light can exaggerate uneven joints and dust.
A practical mock-up helps. Place a panel beside a window, then check it again after dark with the intended fixture. I’d also compare the same profile in two finishes; the result can be surprisingly different. Not every wall needs more texture. Sometimes a quieter surface works better.
Key Benefits for Interior Projects
Fluted wall panels bring rhythm and depth to a room without relying on bold color. Their vertical grooves can make a low ceiling feel taller and give a plain wall a clearer focal point. In a hallway, soft side lighting catches the ridges and creates subtle shadows. The effect changes throughout the day.
These panels can also help define zones in open-plan interiors. A fluted section behind a desk or dining nook adds visual separation without building a full partition. Many options are lighter and quicker to handle than solid timber, though weight and installation needs vary by material. A flat, sound substrate matters. Uneven walls can make the grooves look misaligned.
There are trade-offs. Dust may settle in narrow channels, so deep profiles can take longer to clean. Some finishes tolerate moisture better than others; check product specifications before using panels near sinks or showers. They are not a cure-all. In a small room, dense grooves may feel busy, especially beside patterned flooring. Testing a sample under the room’s actual lighting can reveal surprises before installation. Don’t skip that step.
Where Fluted Panels Work Best
Where Fluted Panels Work Best
Fluted panels suit spaces where a wall needs texture without busy artwork. In living rooms, they can frame a fireplace or media area; in hallways, vertical grooves add rhythm to a narrow stretch of wall. Reception areas and meeting rooms also benefit from a defined feature wall. In bedrooms, use them behind the bed, where low-glare lighting can reveal the grooves without creating harsh shadows. Scale matters: deep profiles may overwhelm a small room. I would test one panel sample against the actual wall first; photographs often hide how strongly the ribs catch light.
They can support acoustic design, but decorative fluting alone does not guarantee sound absorption. ANSI/ASA S12.60-2010, the classroom acoustics standard, sets a 0.6-second reverberation-time limit for many smaller classrooms. That figure is a useful reminder that sound performance needs measurement, not guesswork. Choose a tested panel system with suitable backing when noise control matters, and confirm its documented ratings. For kitchens or other humid areas, check the panel’s moisture rating and installation instructions before specifying it.
Tips: Use warm side lighting to emphasize the grooves. Keep adjacent walls quieter, and inspect seams at eye level. A small mock-up may look different once the whole wall is installed—that uncertainty is worth allowing for.
Why Choose Fluted Wall Panels? Where They Work Best
A deeper flute creates more visible surface texture. This chart shows the calculated increase in surface area for a sinusoidal profile with a constant 50 mm flute pitch.
Where they work best: Use shallow profiles where subtle texture suits the space, such as corridors and compact rooms. Deeper profiles make a stronger focal point on feature walls, reception areas, and living spaces. The values are geometric calculations, not measured acoustic performance; sound absorption depends on the full panel and wall assembly.
How to Choose Materials and Plan Installation
Material choice should begin with the room, not the finish sample. In bathrooms or laundry areas, check the panel’s moisture rating and the wall’s ventilation. Moisture matters. Wood-based panels can swell if water reaches unsealed edges, while PVC or other composite options may suit damp spaces better. Compare weight, surface durability, and cleaning needs, too. A narrow hallway may benefit from lighter panels that are easier to handle.
Before ordering, measure the wall in several places; corners and floors are rarely perfectly straight. Mark studs, outlets, and trim on a simple sketch. Then calculate panel coverage and allow extra material for cuts and mistakes. Small errors show. Dry-fit a few panels first, checking how the grooves meet at corners and around openings. If the pattern repeats, plan the starting point so a thin sliver does not land at the most visible edge.
Prepare a clean, dry, reasonably flat surface. Remove loose paint and fill deep dents; panels can follow bumps rather than hide them. Follow the chosen product’s guidance for adhesive, screws, and expansion gaps. Leave the recommended space near floors and ceilings, especially where temperatures change. Cut with suitable eye protection, and test the blade on an offcut. I’ve found that rushing the first panel often creates a crooked run. It is worth pausing to check level again.